Welcome to My World on the Net!!

Thanks for stopping by!! Take a look around, hopefully you will find something you like or can use!!
***All .mtc files are layered and ready to cut. Any .svg files are ready to be worked on-not layered for cut. ***
Showing posts with label Baby Shower Ideas. Show all posts

Saturday, May 7, 2011

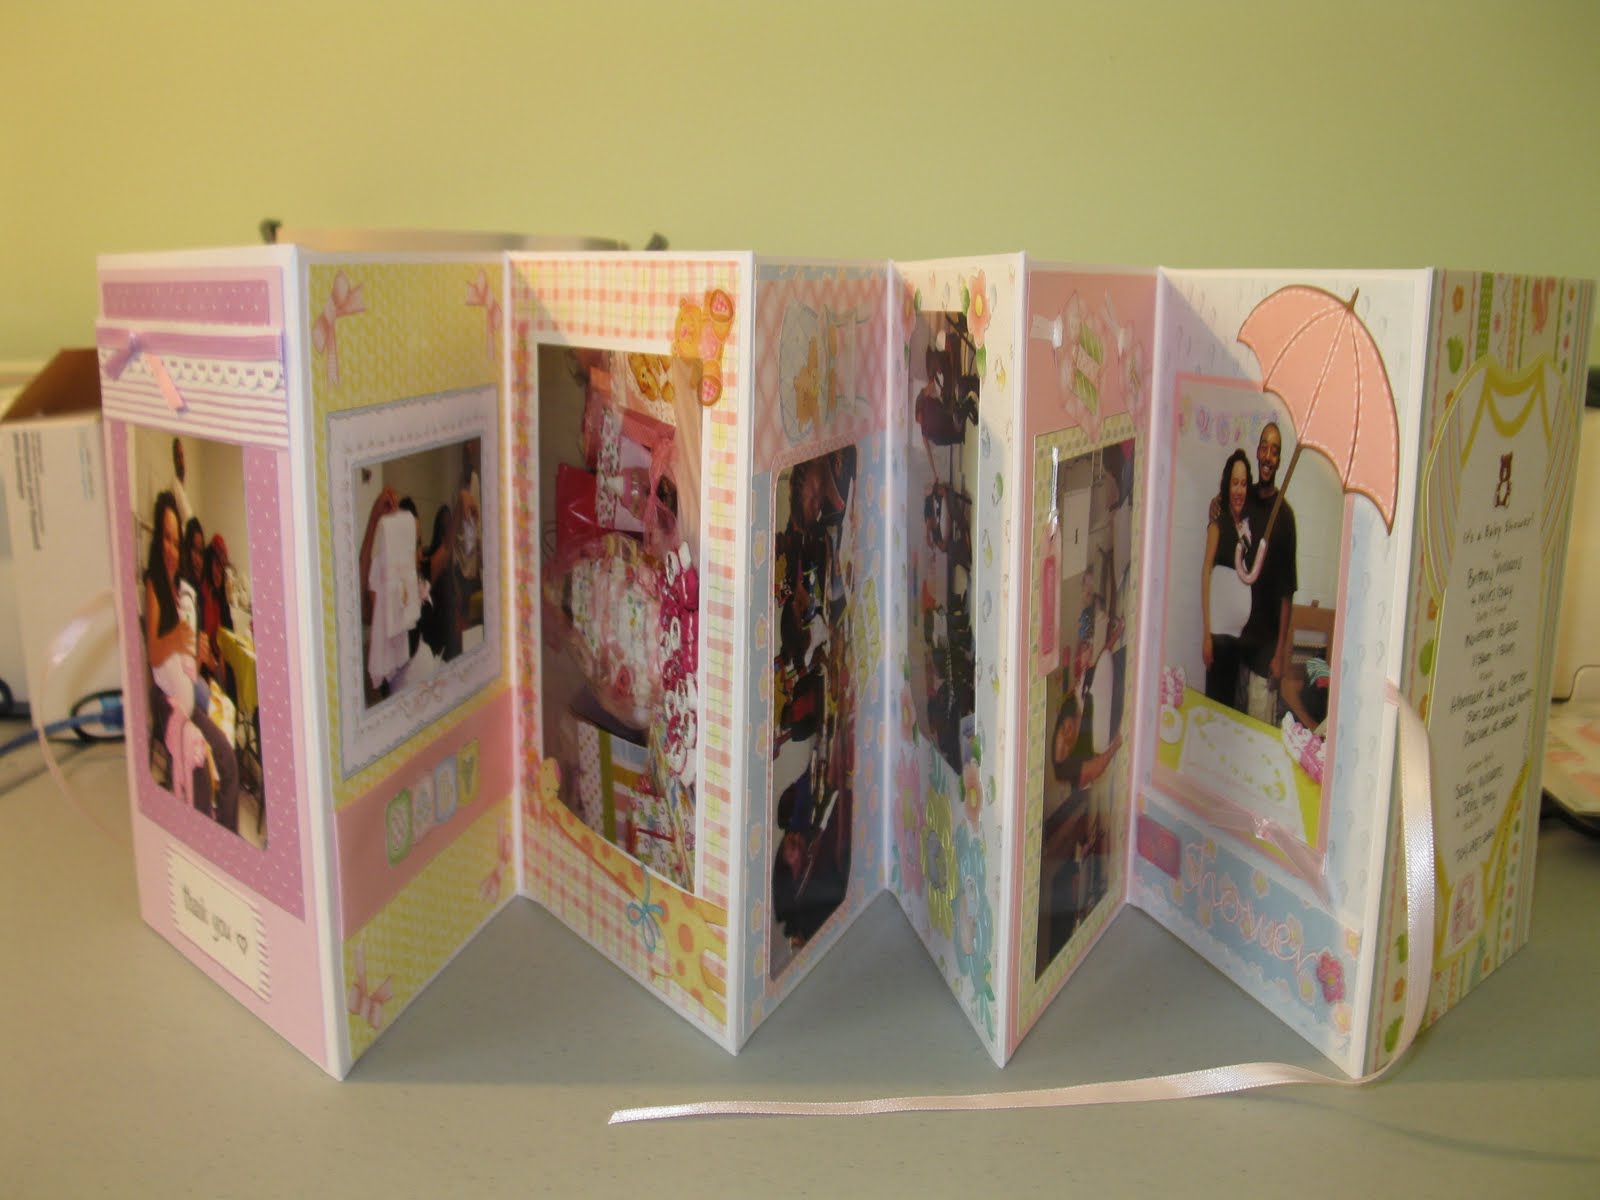
Envelope Photo Keeper Album

I had already started this project but figured what better day than today to finish it. National Scrapbooking Day!

Okay so if you are like me you have tons of photos but only pick from a few to put on scrapbook pages. Sometimes I have a lot that I still would like to show off. So I have made another type of mini-album to hold all of the extra photos and keep them arranged by event.

 Directions:
This mini-album is made using 5-3/4" x 8-3/4" white greeting card envelopes. It will fold accordian-style once completed. You can use whatever number of envelopes you choose to depending on how many photos you have to put in the envelopes and how many envelopes you wish to decorate. With this one I used 7 envelopes. 

To make, you layer the envelope bottom edge (open side of envelope) facing up, over the flap of the next envelope, sealing the flap to the front bottom of the envelope with adhesive. Once you have all envelopes attached. You will need to make a front cover for the first envelope flap that has not been attached to an envelope. Cut two pieces of heavy cardstock 5-1/2" x 8-3/4". Attach these to the front and back of the first envelope flap as well as to each other to make a cover.

Then you can begin embellishing the front and back of the envelopes.
Here are the dimension of the scrapbook paper pieces you will need to complete the book:
Inside Liner (where the photos are kept): 8" x 2"
Inside Liner (for the outer envelope): 8-1/2" x 4-1/2"
Front of envelope: 8-1/2" x 5-1/2"
Ribbon to add to the front cover and to the last page.

Tip: Before starting this project or any other project I like to draw out a diagram of how it will be put together, then I can make changes as needed. After completing this project, I found that this would fold easier using an even number of envelopes.

Hope you like this project.


Sunday, November 7, 2010

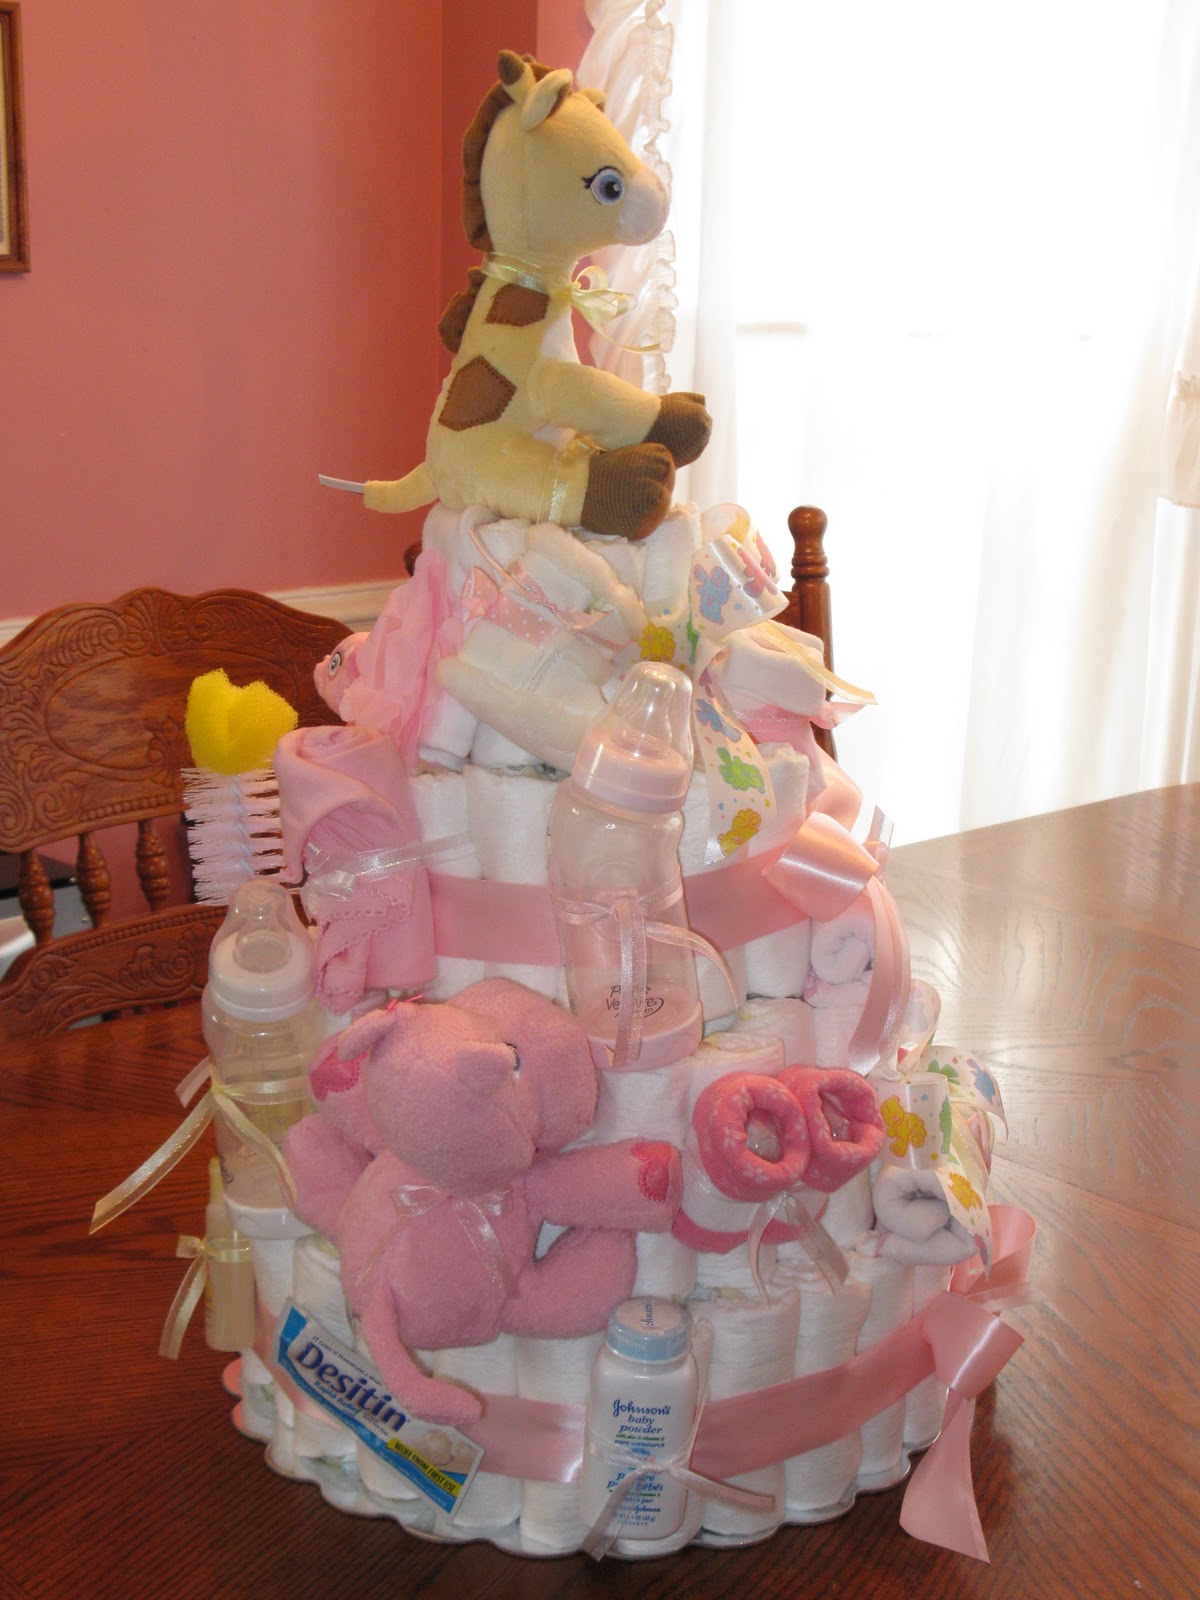
Baby Shower Diaper Cake

I decided to make a diaper cake for my daughter's upcoming baby shower. Take a look, hope you like the pics.

FRONT VIEW 


BACK VIEW


LEFT SIDE


RIGHT SIDE

To make this I used 8 diapers on the top tier, 22 diapers on the second tier, 44 diapers on the third tier and 66 diapers on the bottom-fourth tier.

To make this I rolled a Pampers size 1 diaper from the open waist edge to the crotch edge. Secured it with a rubberband. Once I had 8 done, I placed one in the center and surround it by the other 7. I then secured them all together with another rubberband. This was my first tier.

For the next tiers I followed the above and made another 8 diaper circle then I stuffed additional diapers in between to make another outer layer around the seven. This become my second tier. For the next two tiers I did the same thing just adding another outer layer around each time to increase the layers.

Using a cardboard cake platter found in the cake decorating department I placed the fourth layer on top. Then I placed the third tier on top of the fourth tier added two dowel rods down the layers on opposite sides. This helps keep the layers together. Then I added the second tier on top of the dowel rods and then the top layer. I placed wide ribbon over each layer to hide the rubber band. And then added a big bow with the matching ribbon. I then used thinner ribbon to secure different baby items all around the cake. After it was all completed I wrapped the entire cake in tuille (pic not shown) with a big bow on top to deliver it to the baby shower.

This was a lot of work but the end results were so worth it. I think it turned out fantastic. Hope you like it and are inspired to try one yourself.

Baby Shower Stroller Decoration

This baby stroller was created in the Make the Cut software and cut out with my Cricut. I am not the creator of this wonderful idea. It was shared with me by a wonderful person over on the Make the Cut forum: Rachellann. Rachellann designed this file and shared it with me so that I could make one for my daughters upcoming baby shower. Someone on the forum suggested that it could sit on the refreshment table and hold either nuts or mints.


Thanks Rachellan for sharing this file. If you would like to see this file or other creations she has made you can visit her on her blog: rachellsmanycrafts.blogspot.com or over at the Make the Cut forum: make-the-cut.com.

Baby Shower Treat Holders

Baby Bootie Treat Holders

I made these Hershey Kiss treat holders for the refreshment table for each party guest attending my daughter's baby shower.


To make these treat holders, you will need a beverage size paper napkin, plastic disposable bathroom cup, three cotton balls and ribbon approx 13 1/2" long. Unfold the napkin, place the cup almost in the middle of the napkin. Place the three cotton balls beside of the cup to form the toe section of the bootie. Pull the paper napkin up over the cotton balls and the cup, stuffing it into the inside of the cup. Tie the ribbon around the middle of the cup, ending with a bow. Fill with Hershey Kisses (takes about 7 pieces for one). Makes a cute treat holder to add to any baby shower. Make one for each guest coming.