Click Here For this MTC File.
Saturday, April 9, 2011
Easter Basket With Eggs
This file has a lot of detail pieces. A suggestion when cutting, cut by sections, as it's layered in the file. Leave the pieces on the cutting mat and take off each piece and place it in place on the background, one piece at a time. This way you will know where each little piece goes.
Click Here to get this MTC file.
Tuesday, March 22, 2011
Happy Tuesday
I have not updated in awhile. I got caught up in the Facebook craze of playing the games, was especially addicted to Frontierville.....it took over my life. No crafting, reading, anything. I have taken hold of my life again and pushed Facebook to the side. I will check in periodically to keep up with friends but it is back to what I like to do....crafting.
Some of you may have heard recently that the lawsuit between MTC and Provocraft was just settled and MTC will no longer support the Cricut machines. I still have the latest version of MTC. It has been said that as long as you don't update, you can still use MTC with your Cricut machines. I don't plan on updating for now. I have decided to boycott, along with many others, Provocraft and refuse to purchase any more of their products. I believe this was a huge mistake on PC's part. So just in case something goes haywire and my copy of MTC will no longer work with my Expression forcing me back to just cartridges, I decided to take an alternative route to keep my own creative freedom.
With that said, I am EXCITED to say that Bosskut was having a fantastic sale last week and part of this week on the Gazelle. And I caved. This is going to be my new toy for cutting. The reviews have been awesome and I am so looking forward to getting my package....where are you UPS man? I heard it even cuts a "full" 12 inch border, unlike the Expression that can't.
Hopefully soon, I will be adding more cut files to share and maybe even some tutorials or videos.
Have a Happy Tuesday!!!
Some of you may have heard recently that the lawsuit between MTC and Provocraft was just settled and MTC will no longer support the Cricut machines. I still have the latest version of MTC. It has been said that as long as you don't update, you can still use MTC with your Cricut machines. I don't plan on updating for now. I have decided to boycott, along with many others, Provocraft and refuse to purchase any more of their products. I believe this was a huge mistake on PC's part. So just in case something goes haywire and my copy of MTC will no longer work with my Expression forcing me back to just cartridges, I decided to take an alternative route to keep my own creative freedom.
With that said, I am EXCITED to say that Bosskut was having a fantastic sale last week and part of this week on the Gazelle. And I caved. This is going to be my new toy for cutting. The reviews have been awesome and I am so looking forward to getting my package....where are you UPS man? I heard it even cuts a "full" 12 inch border, unlike the Expression that can't.
Hopefully soon, I will be adding more cut files to share and maybe even some tutorials or videos.
Have a Happy Tuesday!!!
My new Gazelle will be at its new home soon!!!
Sunday, November 7, 2010
Baby Shower Diaper Cake
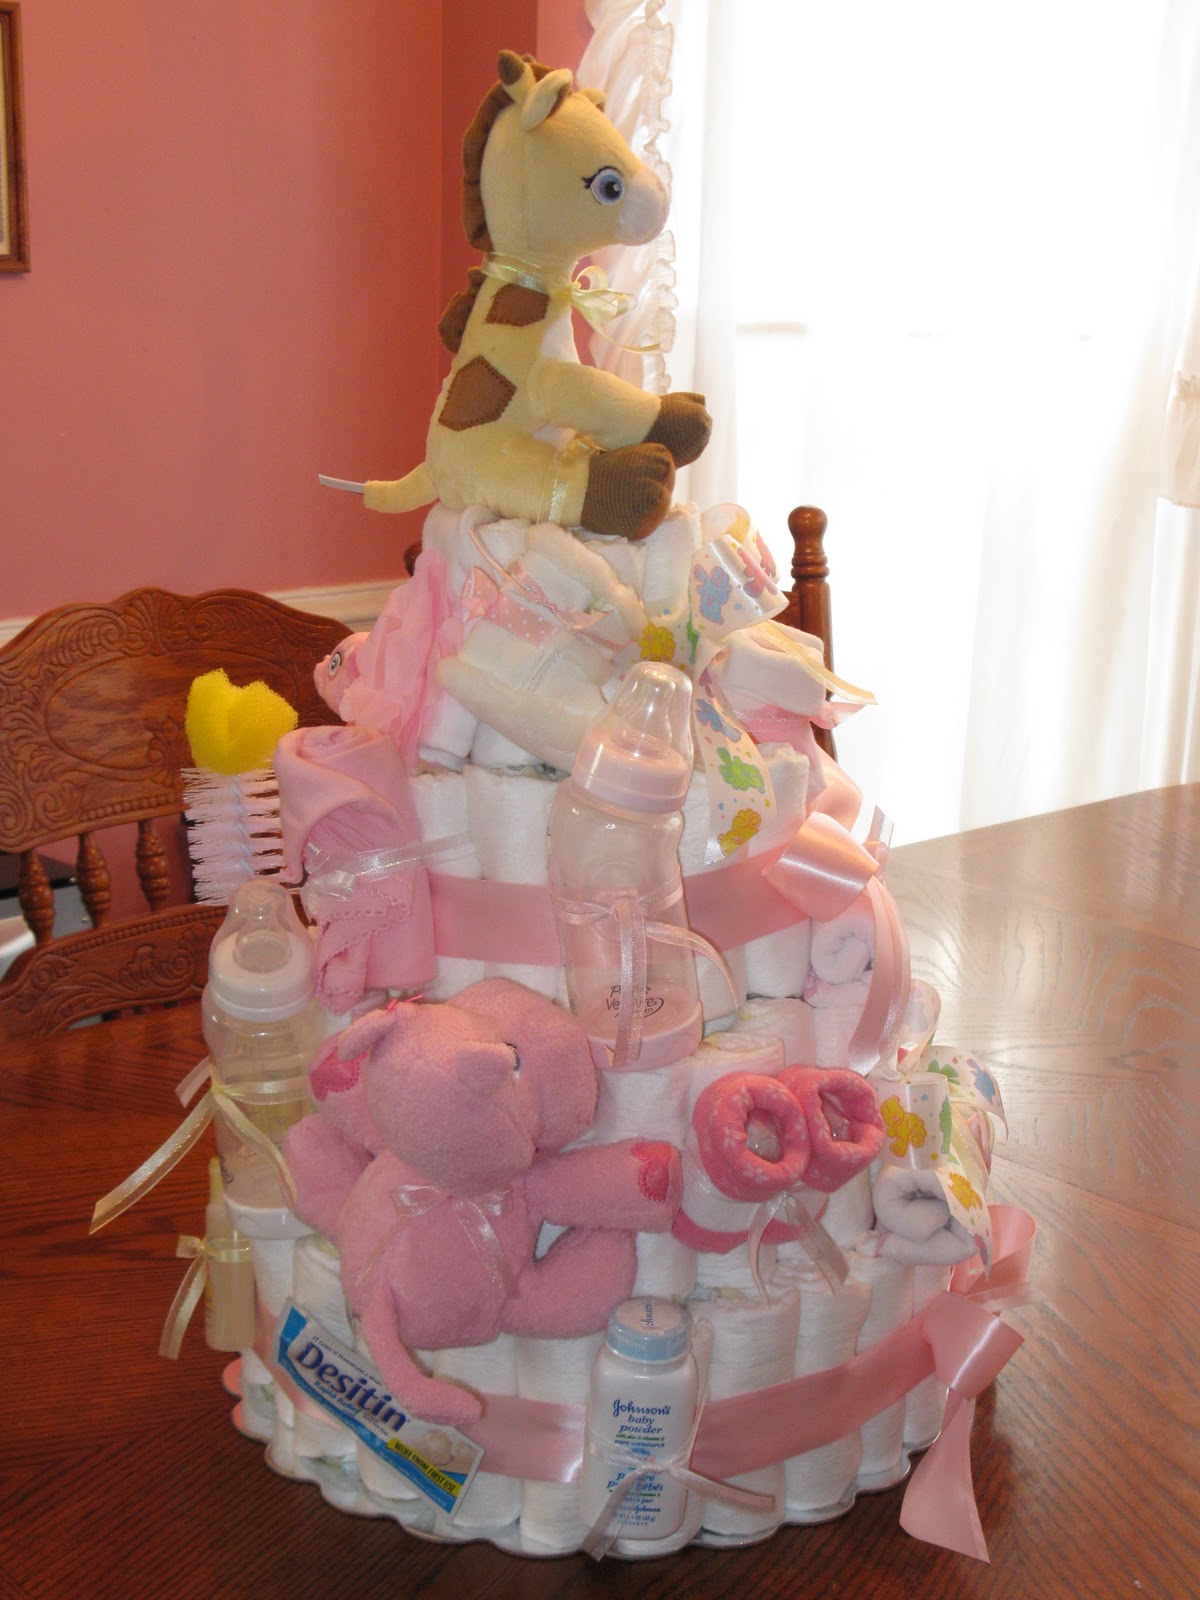
I decided to make a diaper cake for my daughter's upcoming baby shower. Take a look, hope you like the pics.
FRONT VIEW
BACK VIEW
LEFT SIDE
RIGHT SIDE
To make this I used 8 diapers on the top tier, 22 diapers on the second tier, 44 diapers on the third tier and 66 diapers on the bottom-fourth tier.
To make this I rolled a Pampers size 1 diaper from the open waist edge to the crotch edge. Secured it with a rubberband. Once I had 8 done, I placed one in the center and surround it by the other 7. I then secured them all together with another rubberband. This was my first tier.
For the next tiers I followed the above and made another 8 diaper circle then I stuffed additional diapers in between to make another outer layer around the seven. This become my second tier. For the next two tiers I did the same thing just adding another outer layer around each time to increase the layers.
Using a cardboard cake platter found in the cake decorating department I placed the fourth layer on top. Then I placed the third tier on top of the fourth tier added two dowel rods down the layers on opposite sides. This helps keep the layers together. Then I added the second tier on top of the dowel rods and then the top layer. I placed wide ribbon over each layer to hide the rubber band. And then added a big bow with the matching ribbon. I then used thinner ribbon to secure different baby items all around the cake. After it was all completed I wrapped the entire cake in tuille (pic not shown) with a big bow on top to deliver it to the baby shower.
This was a lot of work but the end results were so worth it. I think it turned out fantastic. Hope you like it and are inspired to try one yourself.
Baby Shower Stroller Decoration
This baby stroller was created in the Make the Cut software and cut out with my Cricut. I am not the creator of this wonderful idea. It was shared with me by a wonderful person over on the Make the Cut forum: Rachellann. Rachellann designed this file and shared it with me so that I could make one for my daughters upcoming baby shower. Someone on the forum suggested that it could sit on the refreshment table and hold either nuts or mints.
Thanks Rachellan for sharing this file. If you would like to see this file or other creations she has made you can visit her on her blog: rachellsmanycrafts.blogspot.com or over at the Make the Cut forum: make-the-cut.com.
Baby Shower Treat Holders
Baby Bootie Treat Holders
I made these Hershey Kiss treat holders for the refreshment table for each party guest attending my daughter's baby shower.
To make these treat holders, you will need a beverage size paper napkin, plastic disposable bathroom cup, three cotton balls and ribbon approx 13 1/2" long. Unfold the napkin, place the cup almost in the middle of the napkin. Place the three cotton balls beside of the cup to form the toe section of the bootie. Pull the paper napkin up over the cotton balls and the cup, stuffing it into the inside of the cup. Tie the ribbon around the middle of the cup, ending with a bow. Fill with Hershey Kisses (takes about 7 pieces for one). Makes a cute treat holder to add to any baby shower. Make one for each guest coming.
Monday, June 14, 2010
Daisy Border, Corner "Punch" and Daisy Frame
Here is a Daisy Border and corner "punch" that you can use to make any borders or even Frames. I created the 4x6 frame to show how this can be done. If you need a smaller border, use a cutting shape and change this from 6 or 4 to 2, 3, or 5 daisies. Add two of the 6 daisy borders together to create a 12 inch border. The possibilities are endless. To create the frames just use the copy, mirror, flip and weld functions in MTC.
Enjoy!!

Enjoy!!
If you would like this MTC file click HERE.
If you would like this SVG file click HERE.
Wednesday, June 9, 2010
Update.....
Hi all,
been away a little bit doing the vacation thing. We went to Myrtle Beach for the last week of May and had a blast. But then of course once vacation is over you sorta have to make up for it at work because that weeks work doesn't stop.
So I haven't had a chance to post for a little bit.....BUT......
I will be very shortly as Make the Cut has now come out with another update. It is still in the Beta version...but Andy has really out done himself with this newest version. Take a peek at what he has done: HERE-Make The Cut!
NOTE: This new update is still in the Beta Test version, so if you haven't downloaded the prior version or the trial do that first and play with that. Experienced users are trying out the new Beta update to work out any "kinks" before Andy actually releases it to everyone.
I am so ready to play with this new version and will be sharing some more info (maybe even some new tutorials) very soon.
Check back for some more free files that I will be adding soon.
been away a little bit doing the vacation thing. We went to Myrtle Beach for the last week of May and had a blast. But then of course once vacation is over you sorta have to make up for it at work because that weeks work doesn't stop.
So I haven't had a chance to post for a little bit.....BUT......
I will be very shortly as Make the Cut has now come out with another update. It is still in the Beta version...but Andy has really out done himself with this newest version. Take a peek at what he has done: HERE-Make The Cut!
NOTE: This new update is still in the Beta Test version, so if you haven't downloaded the prior version or the trial do that first and play with that. Experienced users are trying out the new Beta update to work out any "kinks" before Andy actually releases it to everyone.
I am so ready to play with this new version and will be sharing some more info (maybe even some new tutorials) very soon.
Check back for some more free files that I will be adding soon.
Sunday, May 16, 2010
CyberCrop Weekend
This has been a busy weekend of crafting. Over at the MTC forum, I participated in their first ever CyberCrop weekend. There were 10 Challenges and 9 Bonus Challenges. You had to do a separate project for each challenge. I was only able to get 7 out of the 10 Challenges completed. Hey but that is more crafting in a weekend than I think I have ever done. LOL!!!
See below for my projects.
Challenge #1 - Color Challenge. Use only the colors Purple and Turquoise (white/black could be used for any journaling).
Challenge #2 - Create a title in MTC with a graphic attached to the words.
Challenge #3 - Create a project using vinyl.
I did not get to Challenges #4 & #5.
Challenge #6 - Paper Piecing. Create a paper piecing piece using MTC.
(note: This is the little lamb from the Strawberry Shortcake series I shared.)
Challenge #7 - Create a project using an animal theme.
Challenge #8 - Use three flowers on your project.
(Made this Get Well Card)
I did not get to Challenge #9.
Challenge #10 - Use metal or embossing.
(I used my cuttlebug and nestability embossing dies
for this birthday card.)
Well, that was my first ever online crop and it was a lot of fun. I am looking forward to participating in many more. Want to join in on some of the fun, join us over at the Make the Cut forum.
Labels:
Cards,
Copics,
Cricut,
Cuttlebug,
Layouts,
Magnolia Stamps,
Make the Cut Files,
Nestabilities,
Vinyl
Subscribe to:
Posts (Atom)